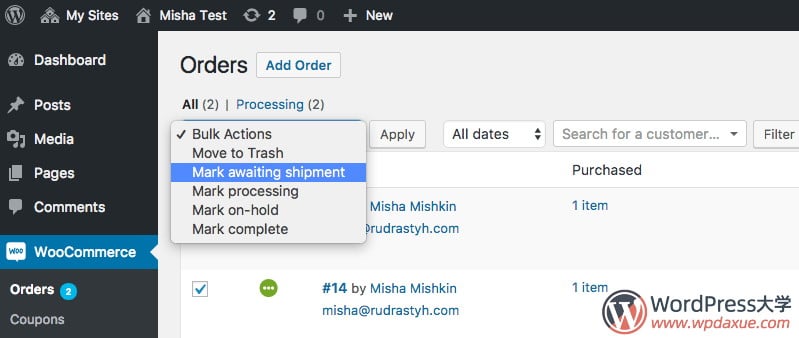
WooCommerce已经允许批量更改默认订单状态。但是,如果您注册了自己的自定义订单状态,现在又想将其添加到“订单”页面上的批量操作中,该怎么办。

您可能找到一个教程,是通过jQuery添加了此下拉列表选择的新选项,但是这种教程已经过时了,因为从WordPress 3.5.0开始,您可以使用 bulk_actions-{screen_id} 钩子来完成。
<?php
/*
 * 在下拉菜单中添加您的自定义批量操作
 * @since 3.5.0
 */
add_filter( 'bulk_actions-edit-shop_order', 'misha_register_bulk_action' ); // edit-shop_order是订单页面的屏幕ID

function misha_register_bulk_action( $bulk_actions ) {

	$bulk_actions['mark_awaiting_shipment'] = 'Mark awaiting shipment'; // <option value="mark_awaiting_shipment">Mark awaiting shipment</option>
	return $bulk_actions;

}

/*
 * 批量动作处理程序
 * 确保挂钩中的“动作名称”与上述函数中的选项值相同
 */
add_action( 'admin_action_mark_awaiting_shipment', 'misha_bulk_process_custom_status' ); // admin_action_{动作名称}
function misha_bulk_process_custom_status() {

	// //如果未显示具有订单ID的数组,则在
	if( !isset( $_REQUEST['post'] ) && !is_array( $_REQUEST['post'] ) )
		return;

	foreach( $_REQUEST['post'] as $order_id ) {

		$order = new WC_Order( $order_id );
		$order_note = 'That\'s what happened by bulk edit:';
		$order->update_status( 'misha-shipment', $order_note, true ); // "misha-shipment" 是订单状态名称(请勿使用wc-misha-shipment)

	}

	// 当然不需要使用add_query_arg(),您可以内联构建URL
	$location = add_query_arg( array(
    		'post_type' => 'shop_order',
		'marked_awaiting_shipment' => 1, // 标识 ED_awaiting_shipment=1 只是为了给通知设置 $_GET 参数
		'changed' => count( $_REQUEST['post'] ), // //更改后的订单数
		'ids' => join( $_REQUEST['post'], ',' ),
		'post_status' => 'all'
	), 'edit.php' );

	wp_redirect( admin_url( $location ) );
	exit;

}

/*
 * 通知
 */
add_action('admin_notices', 'misha_custom_order_status_notices');

function misha_custom_order_status_notices() {

	global $pagenow, $typenow;

	if( $typenow == 'shop_order'
	 && $pagenow == 'edit.php'
	 && isset( $_REQUEST['marked_awaiting_shipment'] )
	 && $_REQUEST['marked_awaiting_shipment'] == 1
	 && isset( $_REQUEST['changed'] ) ) {

		$message = sprintf( _n( 'Order status changed.', '%s order statuses changed.', $_REQUEST['changed'] ), number_format_i18n( $_REQUEST['changed'] ) );
		echo "<div class=\"updated\"><p>{$message}</p></div>";

	}

}实际上,必须在线上进行的替换:(10批量动作标签和值),19(挂钩中的动作名称)和31(您的自定义订单状态段)。其他更改是可选的。
该代码可以在functions.php或插件文件中使用。
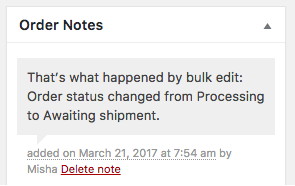
第 30 行中的订购备注(您可以在编辑订单页面上找到):

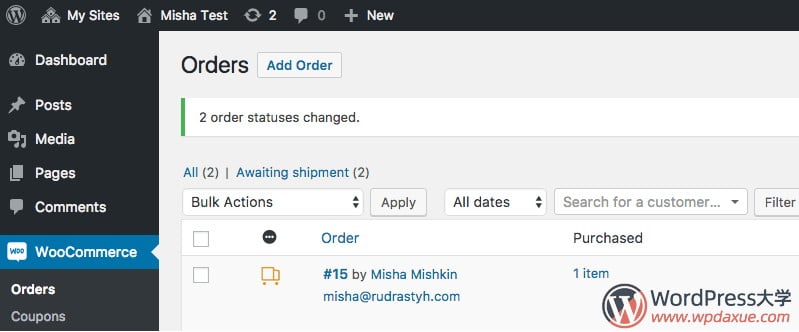
处理批量订单状态更改后的通知:

如果您对 WooCommerce 的使用还不太了解,或者想系统学习 WooCommerce 开发,可以学习教程《WooCommerce 开发指南视频课程(使用详解/主题开发/支付宝网关开发)》。
声明:原文出自 https://rudrastyh.com/woocommerce/bulk-change-custom-order-status.html ,由WordPress大学翻译整理,转载请保留本声明。
声明:本站所有文章,如无特殊说明或标注,均为本站原创发布。任何个人或组织,在未征得本站同意时,禁止复制、盗用、采集、发布本站内容到任何网站、书籍等各类媒体平台。如若本站内容侵犯了原著者的合法权益,可联系我们进行处理。


校长你好,我又来了,之前看了你的添加自定义订单状态后很有启发,现在我想给我的自定义状态加一些样式,请问我要怎么做呢?